How to Install EseeCloud App on Your Smart TV? - Quick Guide
In the modern era of smart technology, keeping an eye on your security cameras has never been easier. With the EseeCloud app, you can seamlessly monitor your surveillance cameras right from your Smart TV, providing you with a large, clear screen to view live footage, review recorded videos, and more. This step-by-step guide will walk you through everything you need to know to download, install, and set up the EseeCloud app on your Smart TV.
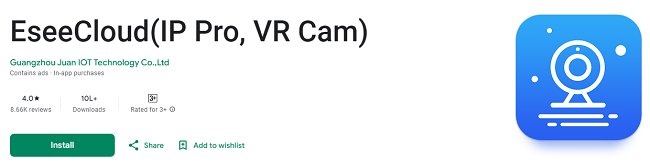
What is the EseeCloud App?
Before diving into the installation process, it's important to understand what the EseeCloud app is. The EseeCloud app is a powerful cloud-based service designed to help users manage and monitor their security cameras remotely. It is compatible with a wide range of devices, including smartphones, tablets, and Smart TVs. With the app, you can access live feeds, control camera settings, view recordings, and even receive alerts about unusual activities.
EseeCloud is an ideal solution for those who want to keep an eye on their property, business, or loved ones from the comfort of their Smart TV. The app is available for both Android and iOS, and it works with a variety of camera brands that support cloud storage.
Why Install EseeCloud on Your Smart TV?
Installing the EseeCloud app on your Smart TV offers several benefits:
Larger Viewing Experience: Watching surveillance footage on your TV offers a much larger and clearer screen than a smartphone or tablet.
Multiple Camera Feeds: Many Smart TVs allow you to monitor multiple cameras at once, giving you a broader view of your property.
Convenience: With a Smart TV, you don’t need to constantly check your phone or laptop. You can simply sit back and monitor everything on your TV screen.
Compatibility with Smart Home Systems: Some Smart TVs are compatible with smart home systems like Google Assistant, Alexa, or Apple HomeKit, which could further enhance your security system's capabilities.
Requirements for Installing EseeCloud on Your Smart TV
Before you begin, ensure you meet the following requirements:
Smart TV with App Store Access: Your TV must be a Smart TV with access to either the Google Play Store, Samsung Smart Hub, or the TV’s app store (depending on the brand).
EseeCloud Compatible Camera: Ensure that your camera system supports EseeCloud. Many modern security cameras are compatible, but it's best to check the product specifications.
Stable Internet Connection: Since the EseeCloud app relies on cloud storage and live streaming, a strong and stable internet connection is essential for smooth performance.
EseeCloud Account: You’ll need to create an account on EseeCloud before you can connect and monitor your cameras. This account can be created via their website or the app.
How to Get & Install EseeCloud App on Your Smart TV?
The installation process varies slightly depending on the brand and operating system of your Smart TV. Below are the steps for installing the EseeCloud app on popular Smart TV platforms.
For Android TV:
Turn On Your TV and Navigate to the Google Play Store
Open your Android Smart TV and use your remote to navigate to the Google Play Store. The Play Store icon is usually located on your home screen or within the Apps section.
Search for the EseeCloud App
Once you’re in the Google Play Store, use the search bar at the top to type in “EseeCloud.” You can use the TV remote or the on-screen keyboard to search.
Download and Install
From the search results, select the EseeCloud app. You’ll see the “Install” button – click it to begin the download and installation process. The app will automatically install on your TV once the download is complete.
Open the App
After the installation is complete, you can open the app directly from the Play Store by selecting “Open.” Alternatively, go back to your TV’s home screen and find the EseeCloud app in your apps list.
For Samsung Smart TV (Tizen OS):
Navigate to the Samsung App Store
On your Samsung Smart TV, press the Home button on the remote and navigate to the “Apps” section. This will take you to the Samsung App Store.
Search for the EseeCloud App
Use the search function in the Samsung App Store to search for “EseeCloud.” Make sure to spell it correctly to avoid incorrect search results.
Install the App
Once the app appears in the search results, click on it and select the “Install” button. Wait for the installation process to complete.
Access the App
After installation, go back to your home screen or apps list. The EseeCloud app should now be available for you to open and use.
For LG Smart TV (webOS):
Open the LG Content Store
Press the “Home” button on your LG TV remote and navigate to the LG Content Store. This is where you can find apps to download.
Search for EseeCloud
Use the search function within the Content Store to search for “EseeCloud.” Select the app from the search results.
Download and Install
Once you’ve found EseeCloud, select it and press the “Install” button. The app will download and install onto your TV.
Launch the App
After installation, you can open the app from the “My Apps” section on your TV's home screen.
For Roku TV:
Roku TVs do not natively support the EseeCloud app, but you can use screen mirroring or casting to view the app on your TV from another device. Here’s how:
Enable Screen Mirroring on Roku
On your Roku TV, go to Settings > System > Screen Mirroring, and select "Enable."
Install EseeCloud on Your Smartphone
Download and install the EseeCloud app on your Android or iOS smartphone from the respective app store.
Mirror Your Screen
Use the screen mirroring feature on your smartphone to cast the EseeCloud app’s interface to your Roku TV.
Setting Up EseeCloud on Your Smart TV
After the installation, the next step is to set up the app and connect it to your cameras.
Sign In to Your EseeCloud Account:
Open the app on your Smart TV and sign in using your EseeCloud account credentials. If you don’t have an account yet, you’ll need to create one. You can sign up through the EseeCloud website or app.
Add Your Camera:
Once logged in, you’ll need to add your security camera to the app. This can typically be done by scanning a QR code from your camera or inputting the camera’s unique device ID.
Configure Camera Settings:
After adding your camera, configure its settings according to your preferences. You can adjust the resolution, enable or disable motion detection alerts, and set up cloud storage options for recorded footage.
Start Monitoring Your Camera:
After your camera is set up, you can begin monitoring it directly on your TV screen. You can choose to view live footage, access recorded videos, and control other settings right from your Smart TV.
Troubleshooting Tips
If you encounter any issues while installing or using the EseeCloud app on your Smart TV, here are some common troubleshooting steps:
App Not Found: Ensure your Smart TV is connected to the internet and that you’re using the correct app store (Google Play Store, Samsung Smart Hub, etc.).
Poor Video Quality: If the video quality is low or laggy, check your internet connection. A faster and more stable connection is necessary for smooth video streaming.
App Crashing: If the app crashes, try uninstalling and reinstalling it. Also, check for any available software updates for your TV.
Camera Not Connecting: Make sure your camera is powered on and connected to the internet. Check if the device ID or QR code is entered correctly.
Conclusion
Installing the EseeCloud app on your Smart TV is a great way to enhance your home or business security by allowing you to monitor live footage and access recorded video from a larger screen. Whether you have an Android TV, Samsung Smart TV, LG Smart TV, or Roku TV, the process is straightforward and easy to follow. With the app properly installed and set up, you'll enjoy enhanced convenience and control over your surveillance system right from the comfort of your couch.
By following the steps in this guide, you can enjoy all the features EseeCloud has to offer, bringing peace of mind and enhanced security to your home or business.
Updates