EseeCloud App for Android: Install & Setup on Your Device
In today's world, security is a top priority for many businesses and homeowners alike. Whether you're protecting your home, office, or property, surveillance systems are one of the most effective ways to monitor your surroundings in real-time. EseeCloud is a powerful mobile video surveillance software designed to help you achieve just that. With its simple, stylish, and user-friendly interface, the EseeCloud app for Android offers a seamless experience for users looking to monitor IP cameras, VR cams, and other video sources.
This guide will walk you through the entire process of installing and setting up the EseeCloud App for your Android device, ensuring you can get your surveillance system up and running quickly and efficiently.
What is EseeCloud App?
EseeCloud is a mobile surveillance application that supports real-time video streaming from IP cameras, VR cams, and other connected devices. It allows you to view video footage remotely, playback recorded content, and manage security settings from your smartphone. Whether you’re using it for personal security, monitoring employees at a business, or ensuring the safety of a commercial property, EseeCloud offers a reliable solution for all your surveillance needs.
Key Features of EseeCloud:
Remote live viewing and playback of video footage
Supports various camera types, including IP cameras and VR cams
Easy-to-use interface with a user-friendly design
Secure cloud-based storage for video recordings
Push notifications for motion detection alerts
Two-way audio and video talk capabilities for certain camera models
High-definition video quality and stable connection
Requirements for Installing EseeCloud on Your Android Device
Before you begin the installation process, make sure your Android device meets the following requirements:
Minimum Requirements:
Android version 4.4 or higher
Stable internet connection (Wi-Fi or mobile data)
Sufficient storage space on your device
A compatible EseeCloud-supported camera or surveillance device
Recommended Requirements:
Android version 8.0 or higher for optimal performance
4G LTE or Wi-Fi connection for uninterrupted video streaming
Camera device with high-definition (HD) support for better video quality
Steps to Download & Install EseeCloud App on Android Device
The installation process for the EseeCloud app is straightforward and can be completed in a few simple steps. Here’s how to do it:
Step 1: Open Google Play Store
On your Android device, navigate to the Google Play Store. If you don’t have the Play Store app on your phone, you may need to download and install it from a trusted source.
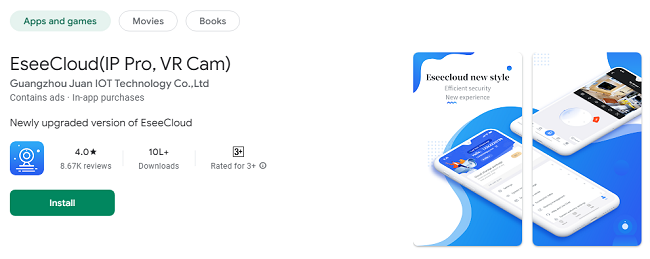
Step 2: Search for "EseeCloud"
Once you’re in the Google Play Store, tap on the search bar at the top of the screen and type in EseeCloud.
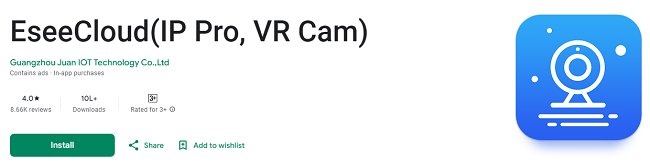
Step 3: Select the Correct App
In the search results, look for the official EseeCloud app. The app should have the developer name listed as EseeCloud or Esee Technology. Make sure it’s the official version by checking the app’s icon and description.
Step 4: Tap on "Install"
Tap on the Install button next to the EseeCloud app. The app will begin downloading and automatically install on your Android device. The installation process usually takes a few moments depending on your internet connection speed.
Step 5: Open the App
After the installation is complete, you’ll see an Open button. Tap on it to launch the EseeCloud app.
Setting Up the EseeCloud App for First-Time Use
After launching the EseeCloud app for the first time, you will need to go through the initial setup process. Here's how to get started:
Step 1: Create an EseeCloud Account
To access the full features of EseeCloud, you’ll need to create an account. This step allows you to sync your settings, devices, and video footage across multiple devices.
Sign Up: Tap on the Sign Up button on the welcome screen of the app.
Enter Information: Provide your email address, create a username, and set a password. Ensure your password is strong and secure.
Verify Email: You may be asked to verify your email address to complete the registration process. Check your inbox for a verification email and follow the instructions provided.
Agree to Terms: Read and agree to the app's terms of service and privacy policy before proceeding.
Once your account is created and verified, you can log into the EseeCloud app using your credentials.
Step 2: Add a Device (Camera Setup)
Now that you're logged in, it’s time to add your IP camera, VR camera, or any other surveillance device to the app. Follow these steps:
Tap on the "+" Icon: On the main screen of the EseeCloud app, look for a plus sign (+) or the “Add Device” option. Tap on it.
Select the Device Type: EseeCloud supports a wide variety of surveillance cameras, including IP cameras and VR cams. Select the appropriate camera type from the list.
Scan QR Code or Manually Enter Device ID:
QR Code Method: Most EseeCloud-compatible cameras will have a QR code on the device or in the user manual. Use your phone's camera to scan the QR code to automatically link the device to your app.
Manual Method: If you prefer, you can manually enter the device's serial number or ID, which is usually found on the camera or in the setup guide.
Connect to the Device: After scanning or entering the device information, the app will attempt to connect to your camera. This may take a few moments, depending on your network setup.
Enter Wi-Fi Information: If necessary, input your Wi-Fi network details (SSID and password) to connect the camera to your home or office network. Ensure the camera and your Android device are on the same network.
Step 3: Configure Camera Settings
Once your camera is connected, you can start configuring it within the app. The following settings may be available:
Camera Name: You can assign a custom name to your camera for easy identification (e.g., "Front Door Camera" or "Living Room Cam").
Resolution: Set the video resolution for the camera, choosing from various quality options (low, medium, high).
Motion Detection: Enable motion detection to receive push notifications whenever motion is detected in the camera's field of view.
Recording Settings: Set up automatic recording schedules, or choose to record only when motion is detected.
Audio Settings: Configure two-way audio if your camera supports it.
After configuring the camera to your preferences, save the settings, and you should now be able to view live video from your device.
Using EseeCloud to Monitor Your Devices
After your camera is successfully added, you can start using the EseeCloud app to monitor your property. Here’s a quick rundown of what you can do:
Live View: Tap on the device thumbnail to view live footage in real-time. You can switch between different cameras if you have multiple devices connected.
Playback: Access the playback section to view recorded footage from your cameras. You can filter by date and time to find specific recordings.
Motion Alerts: If you have motion detection enabled, you’ll receive push notifications whenever motion is detected. You can adjust the sensitivity of the motion detection feature in the app settings.
Two-Way Audio: If your camera supports two-way audio, you can speak to people through the camera’s microphone and listen through the speaker by tapping the microphone icon.
Cloud Storage: EseeCloud provides cloud-based storage for your recorded footage. You can manage and download videos from the cloud, ensuring that important events are never lost.
Tips for Optimizing Your EseeCloud Experience
To get the most out of your EseeCloud app and ensure it performs well, consider the following tips:
Ensure Stable Internet Connection: A strong Wi-Fi or mobile data connection is essential for smooth video streaming and device communication. For best performance, connect your Android device and camera to a stable Wi-Fi network.
Regularly Update the App: Keep your EseeCloud app updated to access new features, security patches, and performance improvements. Check the Google Play Store for updates.
Use High-Quality Cameras: To get the best video quality, invest in high-resolution cameras that support HD or higher video recording.
Enable Notifications: Set up push notifications for motion alerts, so you’re immediately informed of any activity around your cameras.
Troubleshooting Common EseeCloud Issues
While EseeCloud is designed to be easy to use, you might encounter occasional issues. Here are some common problems and how to fix them:
Camera Not Connecting: If your camera is not connecting, double-check that both your Android device and the camera are on the same Wi-Fi network. Restart the camera and app, and try adding the device again.
Video Lag or Buffering: If you experience lag or buffering during live video streaming, try switching to a different Wi-Fi network with better bandwidth, or use mobile data if Wi-Fi speed is slow.
Notifications Not Working: Ensure that push notifications are enabled in both the app and your phone’s settings. Check that the motion detection feature is active and correctly configured.
Conclusion
Installing and setting up the EseeCloud app for Android devices is a simple and straightforward process that can help you stay connected to your security cameras no matter where you are. With its easy installation, user-friendly interface, and powerful features, EseeCloud offers an excellent solution for those looking to monitor their home or business with ease.
By following the steps outlined in this guide, you can quickly install the app, set up your devices, and start enjoying the benefits of remote surveillance. Whether you're using it for security purposes, monitoring your pets, or keeping an eye on employees, EseeCloud ensures that your surveillance system is always at your fingertips.
Remember to regularly update your app, maintain a stable internet connection, and adjust camera settings to fit your needs for optimal performance. Happy monitoring!
Updates